Monday, 19 August 2013

Editing and Mixing Sound: Frequency, Volume and Content

From a large action sequence to a subtle conversation, a huge amount of thinking and planning goes into the sound design to create an engaging, believable and pleasant listening experience. Not only does pacing need to be accounted for, as well as which sounds are needed, but considerations for the frequency and volume are paramount to getting a good mix.

Let's take a couple of examples, mentioned above; an action sequence and a subtle conversation. These are both quite distant in terms of content and frequency, and must be planned thoroughly as such. I'll break each down into relevant components so it's easier to account for.

The Action Sequence:


Set the scene: Let's take a place of action similar to one of the fight sequences in 'Inception'; it's raining, there are many cars driving around with 3 or 4 chasing the main characters in their car. Of course, these cars are crashing into other cars and objects, while the 'henchmen' all have guns of varying power, attempting to kill our protagonists'.

I must first stress something - this is only one of many ways to go about designing, composing and implementing the sound for a scene, regardless of it being an action sequence. It's really up to the director and the way he wants to take the action, or the Lead Sound Designer who may have a particular vision or style. A lot of other films might have had fast paced music over the top of this, but Richard King (the Sound Designer behind Inception) went with a more dynamic approach; bringing forth a much higher impact than if designed otherwise.

Break down into layers:
  • Ambience - Throughout the scene, rain is falling fairly heavily. However, you'll notice the sound is particularly low in volume. The reason for this is to help enhance the dynamic range, which (as stated previously) in necessary for the impactive sounds. In fact, the ambience will likely be taken out at sections where the sound gets busy (crashing, gun fire, louder sounds in general). The same goes for the section where the train appears. Just before this occurs, you'll notice the dynamic range is heightened by leaving only the ambience in at a low volume before the train crashes into the initial cars.
  • Dialogue - Although there isn't much in this section, the dialogue is seemingly set back in the mix, which is another device to increase the impact that crashing and gun fire has.
  • Foley - This is a part of the sound that takes some picking and choosing. Much like a camera can focus on one part of an image, sound (when designed effectively) will do the same. If there is a man walking in the back of a shot out of focus, you generally wouldn't place footsteps on him. Similarly, if 5 or 6 people are shooting guns, but the camera is focus on a particular person, the sound would be mixed towards this person with their gun being loudest and possibly even leaving the sound out altogether for some of the other guns.
  • SFX (explosions, crashes) - In this scene, explosions, crashes and gun fire certainly take precedence. My way of thinking about a mix is to concentrate on the loudest and most prominent sounds, and then add other sounds around them. This way, you get a sense of perspective and shouldn't make too many mistakes in the way of bringing down the dynamic range.
Frequency Content: There are quite a lot of thing going on here. One thing is getting the sounds in, synced and mixed in volume, but making sure they don't clash in the frequency range is hugely important.
Let's consider the ambience first of all. This sets the initial scene, much like a backdrop at a theatre will do. However, you wouldn't have any bright objects or 'loud' images on this, as it would take the attention away from actors and props on stage. So in terms of frequency, you need to leave quite a lot of room for other sounds to happen, such as dialogue, foley and SFX. Therefore, you'll want a low-to-mid range frequency band - this leaves room for low frequency explosions, mid-to-high dialogue and the high-frequency chinks of bullets landing on the tarmac. In short, you'll want the ambience to accommodate all the other sounds; surround them, fill in the gaps.
Dialogue and foley will have a similar frequency range, but different from other scenes or mediums. These would usually take up more of the lower end, taking advantage of the proximity effect in Dialogue or intimacy in foley. However, for this type of scene, any lower frequencies would be EQ'd out (or recorded as such) to leave space for explosions and gun fire.
I've said it enough already, so let's finally get to SFX. These will take up the largest range of frequencies, as the breadth of SFX is quite large in this instance. Explosions, for example, will take up the majority of the lower end, with car crashes similarly lower but with higher crunching sounds layered over. Car engines would usually take up the lower end, but with so many short bursts of lower frequencies, they've designed them to take up more of the mid range. Gun fire will depend on the size of the weapon: hand guns have shorter low-to-mid bursts, with automatic weapons taking up more of the low end.

Fluctuations: As with an overall film, a scene can have fluctuations of frequency content, as to 'fill out' any gaps. For example, I said earlier that cars take up the mid range more here, but for some shorter sections, the frequency tends to the lower-mid. They can get away with this because of so many cuts and perspective changes image wise.

The Subtle Conversation:
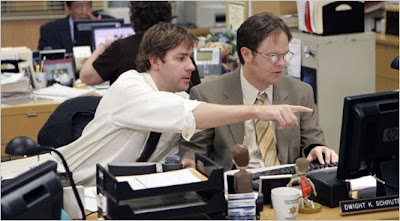


Set the scene: As a big fan of the show, I suppose it wouldn't go amiss to use a scene from The (American) Office as an example of subtle conversation - there's certainly a good amount of it through the entire shows catalog of episodes, ranging from whispered chats to shouting battles.

Break down into layers:
  • Ambience - In this instance, ambience takes up quite a lot of room in the mix. In a way, the ambience in The Office is very much a character in itself. That is, it sets the scene and changes dramatically depending upon the circumstances. Most of the time, it's made up of fans and air conditioning, layered with SFX (detailed below). As there isn't much going on in the way of needing a huge dynamic range, the volume is brought up right behind the dialogue, and fills out the remaining frequency range (more on this later).
  • SFX (Copier, Phones, Doors) - These SFX are placed strategically and help further set the scene and create a 3D space around what you see. In fact, this is a great example of sound continuity. When the camera is facing one way, there will always be something going on around and behind it. These SFX are placed almost as jigsaw puzzles to complete that picture. See someone walk off camera towards a door? The designer will carry on the footsteps and use an opening door sound to signal and bring closure to that movement. Back to the point on hand though - the levels tends to be reliant on how far the objects are from the camera, which gives a sense of depth to the room.
  • Dialogue - For intimate conversations, Dialogue takes more priority than any other sound. Here, the volume tends to stay at a similar volume (regardless of speech type such as whispering or shouting). When the camera is taking a close-up, the proximity effect is utilised to give the sense of intimacy through sound.
  • Foley - In some cases, the foley can take as much precedence as the dialogue in terms of volume and content. The Office, as you might imagine, involves a lot of phone, keyboard and paper handling. These sounds are therefore quite high in the mix and are used as focus tools. For example, some scenes don't have a lot of dialogue, and use the foley to tell a miniature story. This can anything from someone pretending to read a magazine while spying, or Kevin eating a cupcake.
Frequency Content: For The Office, there are some distinct differences in the frequency ranges of each component, but they fill the same gaps for the most part. Of course, the only change here is that there aren't any cars crashing or guns firing, so there's little need to take up that lower frequency range of 60Hz and lower (unless someone punches a wall...).
Ambience now takes up a much larger part of the frequency bandwidth, with more lows and low mids that would otherwise be used by explosions and gun fire. Dialogue varies widely now, with shouting from afar being similar to the action sequence (mid range), while close-up shots use the proximity effect, utilising the low-mids and often lower. Keyboards would otherwise have a very 'light' sounds, taking up the mid-to-high frequencies, but here the sound involves some lower-mids too. Clearly with a show like this, they can use more varied frequencies for sounds that would otherwise not use them.

Fluctuations: Changes in sound are as important as changes in the image for a 'Mockumentary' style show such as The Office. With so many swiftly changing shots, quick camera movements and single-shot takes, it's important that the sound stays consistent and varies accordingly for the scene. Particularly with the one-shot takes, where the camera is walked through the office, sound has to change enough to offer an audible picture of the environment it's moving through. A good exercise is to find one of these sequences and watch it without the image - you'll notice a lot happening which would otherwise seem normal with the image; a consideration necessary for the Sound Designer when mixing everything. In fact, you could do this yourself at your own office or workplace: even there, you'll find fluctuations in volume and frequency content.

Conclusions:
From looking at these two examples, we can quickly see some correlations in the needs of a mix for film, TV or even any form of sound scape: regardless of the style, filling out the volume, content and frequency range appropriately is vital. You could argue the same for a song without a bass guitar; instead, the guitar would need to be 'chunkier' and the kick drum would have a more open deep sound to compensate.

These are thoughts you need to consider when designing the sound for your own project - is the frequency range, volume and content fulfilling the mix? Ask yourself this through the entire process: you won't want to be destructive in editing or mixing and find the decision was made in error.

I hope you've enjoyed this post! Please leave a comment if you have any thoughts to add, or better still, let me know of any personal experiences you've had with this kind of thinking.

Next Time: UDK Game Audio! - I'm finally going to dive into my love of interactive sound. This first post in the series of many will briefly touch on best practices of audio before getting to the importing stage and basic implementation of sound in a 3D game world.

Alex.

Wednesday, 29 May 2013

Quick Update

Hello All!

Just a quick update to say that I'm not dead.

There's been a lot going on at home with refurbishing and moving around; I'm currently in a temporary bedroom that consists of a laid out futon and a small bedside table. However, sound moves onwards and I'm trying my best to keep up with it.

I've been working on a couple of things - first, I'm putting together some songs and will be purchasing a few bits and bobs to help me with recording and mixing. To name a couple:

- 2x Yamaha HS80M's - These babies have had a great range of reviews and I found a pair with stands for just under £420. They'll be going either side of my new desk and should help improve mixes drastically.
- 2x Rode NT2-A's - Both of these come with a shock mount and XLR cable, but one will have a reflection filter for that true vocal cancellation goodness.

The Rodes are a desperate purchase to get me in the large diaphragm realm (Yes, LONG overdue). The speakers I currently use are also embarassingly shody, so the Yamahas will really ground me for mixing (i.e. kick me in the face!).

Secondly, I've been putting ideas together for a simple audio-showcase game called 'The Room". It's works on a similar principal to Portal in it's story telling methods. I enjoy my humour, so hopefully it's going to be a laugh to play. It'll be heavy on dialogue from my side, so at this stage I'm writing the script as well as level design.

I hope this suffices for now, hopefully the room (my room that is) will be done in a couple weeks and I can get back to it.

Alex.

Saturday, 4 May 2013

Editing and Mixing Sound: The Bigger Picture [Part 1]

How do you start a post like this? Understanding the bigger picture is one of those things that, no matter how much you read up on it and get taught about it, you need experience to really get it. What I'll cover here comes from both teachings and experience (and there is quite a lot to cover) so I've broken down this area into a few posts, starting with the entire production.

The Meaning: The best way to understand your production down to it's finest detail is to have a distinct mindset. That is, you have the knowledge of this 'Bigger Picture' which will guide you throughout the entire process. You can think of it as a go-to moto that will help you make your decisions. For example, some companies have a sentence that sums up what they're out to achieve, such as "Encouraging exploration through innovation". This moto should be used throughout the decision making process as a tool: is the decision I'm making now living up to what we're set out to do? If not, think of something else or compromise.

To that end, you want to have a basic outline for your film, song or game. For sound, this will very much depend on the style of the respective production. A lot of action movies, for example, tend to have 'hyper-realistic' sound design, where exaggerations are made to compensate for how out-worldy the violence and destruction looks on screen. This is similar to classical music, which needs to have a huge dynamic range and little alterations in the way of effects or compression. For a sci-fi game (and film for that matter), the sound design would match the alien elements with unfamiliar sounds and effects (go check out Ben Burtt on Star Wars!). You get the picture though; have a feel for what the production is trying to achieve and base decisions around this.

Planning: All productions big or small need to be planned and prepared as a whole. When I first started putting productions together in groups at college or university, planning always seemed to be second to everything else. I would get stuck into the meat of a project and before I knew it, there wasn't enough time to do some vital elements, like setting aside time for proof reading, mixing, optimisation of audio or video etc. After reflecting on these mistakes, plans were put in place for future endeavours and it definitely paid off. It really did go to show that putting a solid plan in place will help you keep track of the production, find your limits and help you work more efficiently.

There are several ways to go about the start of a plan. It's something that needs a lot of discussion, where everything is laid on the table. The way I would tackle this would be gathering everyone who's involved (or at least the heads of departments) and talk through the entire production. You want to know the following:

- A general timeline at first, which will give you your time limits on production milestones.
- The budget you're working with and how you can fit hardware, software, sound libraries and (most importantly) living costs into it.
What kind of sounds you'll need for the production; you can start gathering them long before the main production gets underway if you know what you're working towards.

With these key elements now known, the department-specific plans can be put into place. The simplest way to achieve a planning outline is through a Gantt chart. This portrays the different elements of your project in linear form against a time scale, as shown below:
This was an example Gantt chart that came with the app GanttProject, free for mac users.

This not only lists everything that needs doing, but you're able to put realistic goals with them and detailed notes for specific elements that require.. well, more detail. It was a tool I used back in university and still use now in my day job to make sure projects are planned effectively. However, planning is only one side of the first stage in your production; you also have to get to know your elements.

Know your elements: A plan is kind of hollow if you come to do your first task and it's all new to you. No one wants to be thrown in at the deep end with tight schedules and quite a lot of pressure on your shoulders. This is why it's important to get to know the different stages, what's expected of you and your team, as well as the outcome you want and how you'll get there.

While planning each stage, you'll need to have detailed discussions and make plenty of notes regarding the best way to tackle them. In every section, they'll be multiple challenges, so getting your head around them as soon as possible will help you down the road. You will have to account for challenges that arise on the way though; this will be inevitable. Just prepare yourself as best you can.

A good example of this is loss of data.
No doubt at some point in your project, there will be the risk of data loss, which can be a huge pit fall for progress. You will need to create an effective system for backing up multiple times at set intervals, even if you do work in a server-terminal set up. You also have to worry about multiple people working on very similar elements: you want to make sure that these files are accounted for, whether they are separated or accessed by everyone. With this in mind, we can move nicely on to another important element of a production:

Keeping Track: This is really really important. As soon as planning is out of the way, you'll probably get started with your area of the project. The key to success from this point onwards is to refer back to your plans regularly; otherwise, why would you have set them up in the first place?

It's quite an easy mistake to make when you're starting out. You really have to remind yourself to look at something to remind yourself of what you're doing. A plan for plan? I suppose that's what it is really. The first step to helping yourself achieve this is by using reminders and notifications on your phones/ipods/ipads/computers. They help me in every step of life, so use them in this instance. Down the road, you'll hopefully come to know of deadlines and how much time remains 'off by heart', just through the use of these reminders, so using them early on should pay off.

Also have regular team meetings (more for games/film). No matter what kind of team you're in for whatever job or project, these meetings will give a clear picture of where everyone is and what needs doing to achieve or surpass the current goals. You may find that you're slightly behind and this can spark some more collaborative efforts from a team member who is slightly ahead of schedule. There may also be changes that are out of your hand, like the budget being used ahead of schedule or current events which affect the production. This is more to keep everyone in the loop to make sure everyone is doing their best to achieve every goal.

Reference against existing products: This can go for any sound project. When mixing and mastering, your ears will get fatigued from doing it for long periods of time. The best thing to do in this instance is go away and either do something quietly or listen to something; something different. This will get your ears out of that style which you've been working with and, when you come back to it, you should be able to have that constructive hearing again.

Aside from this, I know from experience that it's quite easy to get it sounding great for you and your specific sound system. What would happen if you were to play another song or film on the same system though, would yours sound bassy in comparison? tinny? too much in the 2-3kHz range? This is why it's important to listen to other finalised material to make sure you're heading in the right direction. As you'll be creating something that's specific to a style, you'll want to compare it to a few songs/games/films in that style, but there's nothing stopping you comparing it with others. After all, if it sounds good and you want to go for a unique genre, why not? This also brings me onto my final point for this discussion:

Feedback: This should be a HUGE part of your process in any project. As part of the meetings, or when you've come to a personal milestone, ask for what others think of what you've done. Constructive criticism will really help you shape your work not just for what you do now, but in the future too. It's actually the most important thing you can take away from the whole experience, because you can keep what you learned for the rest of your life and through every other project. It really upsets me when constructive criticism is given and isn't absorbed due to a kind of stubborn pride, especially for those who you're genuinely trying to help when they need it. It usually leads to an outcome that could have had more potential by having that extra input from others.

I'll give you an example. Back in university (which I never seem to shut up about, my apologies), I was well into my final project. The whole level was designed and constructed, with systems almost finalised and bugs were being crushed here and there. I took the work to my tutor (Richard Stevens, The Game Audio Tutorial) and he had a quick look at it. Immediately, he was finding flaws in not only where a player can go on the map, but how certain sounds would clash or had a slightly harsh side to them. It was hurtful at first to know that what I had spent so long creating was being torn to pieces, but I am now more than appreciative. A very important point that he made was my level seemed to be very long and ambitious. If I were to cut back on the length and have only 5 sections rather than 7 or 8, I could make the quality of those remaining much better and much more polished, which I did. I swear, that 30 minutes discussion turned my project upside down, but it was all for the better and I can't thank him enough.

Conclusion: I haven't covered nearly everything there is to know about planning and completing a project. In fact, I'll probably add another few posts regarding each different type of production: film, game and song. On reflection, I suppose I should have done this at first, but I think what I have written is useful regardless. I hope you found some use out of it!

For part 2, I'll be covering sound specifically and how you want to balance frequency, volume, panning and effects so there's just enough and not too much or little of these. This will revolve around what I've come to know as the 'Sound Cube': probably the easiest way of understanding all these elements as a whole.

Alex.

Saturday, 27 April 2013

Editing and Mixing Sound: Optimising your Recordings

Now I've covered most of the basics for getting a sound source recorded, we can begin to touch on the mountain that is post-production. There are many stages involved in getting your sound from a 'raw' form (that is, straight from the recorder) into something that can be used and integrated into a production; be that a film, game, user interface for a vehicle etc. As this series of posts is going to cover quite a lot in terms of what you can do with sounds in post, I'll start with the step that all productions should start with - optimising recordings.

For the following post, I'll be using Audacity, just because it's a free tool that anyone can use on both Mac and PC. However, the methods shown can apply to most audio editing tools as well as DAWs (Digital Audio Workstations).

Step 1: Cut and Chop, but be wary of a Pop!
Inevitably when recording sound, there will be points of (almost) silence and sections of noise which will be of no use to you. The best thing to do with this sound is to either silence it or delete it all together. To silence the sounds you don't need, Audacity has a feature which allows you to 'Generate' it. The below image shows a sound recording with 2 pieces of audio we want, and some noise that we don't.
This is the editing window for Audacity. Here, we have the recording and I've selected
the noise that we want to remove.

With the default selection tool, you can drag along the desired area of which you want to 'create' the silence, or remove the unwanted noise.


With this noise still selected, we go to Generate and Silence. A small prompt appears
outlining the length of silence to generate (which should be the selected area).

The final product is shown below, now effectively without the unwanted noise.

The selected noise has now been removed from the recording.
You can (and should) take this further though. With all editing, there is the risk of interrupting a zero-crossing point. What is a zero crossing you ask? Well, when a sound wave fluctuates, it does so above and below a point of no movement - known as the zero crossing point. This is illustrated below, where the vertical line lies:


If you choose to remove a portion of your sound, you have to make sure that the start and end of the cut is on a zero crossing. Otherwise, you get what is shown below: a sharp jump in the waves fluctuation. The result of these non-zero crossing edits is a popping sound, which can cause a lot of issues for loops especially.


So how do you prevent such horrible audio gremlins? There are two things you can do which will both help keep the sound from popping and increase your work flow.

1. Zero Crossing Snap: In a lot of audio editing software, there is an option to only snap to zero crossing points. This means that, no matter where you click on an audio region, the cursor will only  snap on a point of no movement. This saves time, as you're not forever having to zoom in and fine tune the selection at a waveform level. This is something I would recommend using a lot of the time, with only a few cases where you might need otherwise, like creating loops that start and end above or below the zero crossing point.

2. Fading: Particularly for editing noise and unwanted audio either side of that you wish to keep, an easy way to clean up zero crossings and unnatural sounding cuts is to apply short fades. Obviously, this means a fade in before the desired audio and a fade out at the end of it. For splicing audio together, you can use this same technique on both bits of audio, and overlay one on the other ever so slightly so an almost 'seamless' transition occurs. Wherever possible, I would always try to bake these fades in, to save strain on a DAW session file. Fades can take up vital CPU power, so having all these edits in the audio file itself really helps put the work elsewhere for your processor, such as the Automation of a track.

Separating Sounds
When you've made a clear separation for your sounds by deleting unwanted audio, it's now time to create individual files for these. As far as I'm aware, Audacity doesn't have the most intuitive process to save separate sounds, but Adobe Audition (which I use a lot of the time) allows you to separate sounds and save them accordingly with very little input. Regardless, we'll go over how to process these sounds in Audacity.

So at this point, we have 2 sounds that were recorded within the same take. The first thing we'll need to do is cut one sound out (or copy it if you're wary of data loss). The next thing to do is create a new session and add a mono or stereo track, depending on the type that you copied from; stereo in this case, as the recording was made in stereo.


When this has been created, we simply paste the audio into it and we have our sounds separated. Now, if you've recorded lots and lots of sounds in one session that you'd like to chop up, this is obviously going to take a bit of time. Unfortunately, Audacity doesn't have any tools to compensate for this, but another method is available where you can keep a single session and not have to chop up all your audio. This does require you bouncing the file directly out, but it means you can separate everything much quicker. All you have to do is select the audio you want separating and then Export Selection (make sure you have the format WAV or PCM selected, I'll explain why later).


Removing Unnecessary Audio
This can apply to every kind of production, but is especially important for Game Audio. Due to the memory limitations on consoles and mobile devices, every aspect of a game must be optimised to the nth degree, including audio. The first means of optimising a sound in this instance is removing any waste audio at the start and end of it. The most effective way of doing this is by selecting the silence up to the start of the waveforms movement and then zoom in to fine tune the selection.

Here, I've zoomed in to fine tune the selection. It's far too easy to delete too much by
accident, so always listen to the sound as you're deleting.

There are some instances you must be wary of though. In the past, I've removed a little too much audio either side, which has created a distinctive 'jump' in volume. More often than not, this occurs when removing audio from the end of a sound, as natural reverberence can be mistaken for unwanted noise. To avoid this, always listen to the sound as you're deleting; if you delete too much, just go back on yourself (undo is your friend!).

This is a good example of too much audio selected for deleting.

If for whatever reason the sound you have has a 'jump' in volume that you can't go back on, there is another solution - a short fade in or out, as I discussed earlier. For example, you have a sound which has a very short build up before the body of the sound (a ray gun possibly?). Unfortunately, when the sound was separated from a session with a few takes, the build up was cut off slightly and now sounds unnatural  To help improve this, you can select a short portion of the start and apply a 'fade in' to it.

If the cut off is at the start, select a small portion and apply a simple Fade In...

...Similarly if the end is cut off, apply a short Fade Out.

With other productions, such as sound for film or music, it's not a huge issue if silence is left in the file, as automation or gating can remove this from the final mix down. However, new technologies in the near future (I'm looking at you, Pro Tools 11) will mean than removing silence WILL have a benefit on CPU usage, at least in the post-production stages. This is due to the way in which plugins currently work to process sound: when the session is playing, all plugins are in constant use, regardless of there being sound in the track to play, which is quite a large waste of processing power. In this new software, the DAW will now look forward in a track to see exactly where a plugin needs to turn on and off, vastly reducing usage.

Now that the sound has gone from being recorded to separated to optimised with the removal of unwanted sound, we can now move on to the volume side of the waveform.

Step 2: Gain and Normalisation causes much less Frustration
Thankfully, this next step doesn't take too long to accomplish, but has a lot of issues that need to be avoided. Basically, when you have your sound recorded, the signal strength generally doesn't take advantage of the headroom available. This is for good reason though, as it's used as a safety net in case the sound decides to jump in volume. However, with the sound recorded, we can now adjust this gain level to take advantage of that space left behind.

The easiest, quickest and safest way to achieve this is by using the normalisation function on your audio editor. This will take the entire waveform (or a selection) and bring the gain up until the highest peak hits the limit that you set. For example, the below image shows a waveform on the left which is unchanged. If we normalise to 0dB, it will increase the volume until the highest peak is exactly at 0dB, which gives us the waveform on the right.

This way, the waveform is increased in volume, but avoids distortion.
The second method is by increasing the gain manually. This does give you a little more freedom and is great for when your sound source has a little more noise floor than anticipated, but runs the risk of distorting the waveform... and once the sound is distorted in a destructive editing environment, you can kiss it good bye. This is why you should ALWAYS account for backups, save your sessions often and save them separately for progress!

Step 3: Simple EQ, which is easy to do
So just from listening to your sound source, you should have an initial impression of the frequency range it has and what you'll want to gain from it in production. This is where you can use that impression to help you get a feel for what frequencies will ultimately be removed and kept. At this stage however, we just want some very simple EQ that will remove the 'invisible' frequencies. By this, I mean the frequencies outside of what the source uses. Well how is this possible? Surely if you record a source with a range between 500Hz and 5kHz, you'll only pick up those frequencies? Unfortunately, the nature of a recording states otherwise - your microphone will literally pick up everything it is capable of. This is why we have shock mounts for condenser microphones, to help prevent deep rumbles and sharp movements coming out on the recording. In fact, no matter how well you set up a microphone, there will always be some form of unwanted frequency that needs removing in some capacity; this is why the HPF (high pass filter) is your best friend. This will bypass all that sub-frequency content that would otherwise come back to haunt you in post production.

Now I've covered that, let's look at a real world example. Here again, I have my recorded sound, now cleaned up with all unwanted noise removed and gained correctly.

By going up to Effect and selecting Equalization from the toolbar, you can add a very simply HPF that will remove any unwanted low frequency content. Below you'll see the interface which has been built for Audacity. A lot of modern DAWs have a simple button which adds a HPF; all you have to do is adjust at what frequency it starts to cut and how quick the volume slopes off. With this though, you get a simple line tool which you can adjust by adding points and moving these around. I've drawn 2 points on this and left 1 at 0dB around 100Hz and the other dragged all the way down to remove all those frequencies and below.

It's worth mentioning here that you don't really want to cut too much. Later on in post-production or in another project, you may want to use a certain frequency range that was removed in this step. What you want to do is hear how the EQ affects the sound before applying it, as the whole point is NOT to have the HPF affect the sound obviously. It may seem very strange to say that after all I've explained, but it's more of a cleaning exercise than an attempt to make your source sounds better. There are two simple examples of where this is a clear benefit later on in production:

  1. Layering sounds: When you get to a point in the production where multiple sounds start to pull together and play along side each other, these sub-frequencies start to build up if you haven't removed them. They can cause a lot of problems with the bottom end, so you can save some time by removing these now.
  2. Pitch shifting: If you don't remove these frequencies and decide to pitch shift your sources up, you might start to hear what was once too low to hear naturally. E.g. if you have an 'invisible' frequency at 20Hz and pitch shifted your sound up 3x, this would turn into noise at 60Hz, which is well within hearing range.
You can also use a LPF (low pass filter) to cut out a lot of the higher frequency content. This is best for being used on any low frequency sounds that don't have any mid or high frequency content initially, as you don't want to remove anything you might need in the future. Again, it's a cleaning exercise to make your life a little easier later in the post-production stages. Removing unwanted low frequencies is more important at this stage though.

Now that we've got our basic source all cleaned and ready to go, we can bounce the sound ready for use in a production.


Step 4: Bouncing your Sound and the King is Crowned
This is very important to get right for any production. At this stage, you don't want to loose any quality from the recording session, which should have been done at as high a quality as possible. The biggest mistake made here is thinking that mixing down or bouncing a sound to mp3 or another lossy format is ok, as long as it has a high Kbps rate. This is not good! Only when your production has gone through a final mixing and mastering stage are you even allowed to think about mp3 or lossy, which I choose not to condone anyway. When bouncing your sound, use a lossless format like .aiff or .wav.

As long as you've taken the steps above, this should be very easy to do. In audacity, all you are required to do is Export the sound from the file menu, and make sure the format is WAV (or PCM [Pulse-Code Modulation] as some software shows it) as shown below.

I want to mention something that I feel is very important before I conclude this blog post. Consider how you name your sounds and where you bounce them, as you'll probably be saving a lot of them. It's far too easy to save sounds with odd names or ones that have no meaning. Before you know it, you're taking a significant amount of time to find what you need. It's therefore best to come up with a naming scheme that will allow for quick and easy searching of specific sounds. Let me explain what I mean.

First, you may want to start the name of the file with what kind of sound it is. If it's an ambience, you may put an 'A' at the start. Next, you may have many different types of ambiences, like mechanical or forestry. For this, you can add a '_Mec' for mechanical, or '_For' for forestry. Then finally if you have a few ambience tracks with the same feel, you can have a number for each one. The final name therefore would be along the lines of 'A_Mec1' or 'A_For3'. Another example for an SFX of a big gun with natural reverb could be 'SFX_Gun_Big_Verb1'. You get the idea.

Conclusion: I hope what I've covered has made sense for the most part. As said earlier: at this stage, you don't really want to be altering what your source sounds like; you just want to clean it up and make it easy to work with once you get to your production. When we come to the DAW stage, with adding sounds and creating track groups, we can really open the doors to EQ, compression, effects and all the lovely bits of Sound Design that really make it worthwhile. Also, many apologies for the section titles; on reflection, they're in line with what a teacher might put on some slides to make their subjects more interesting. Please feel free to slap me through the internet.

Next time, I'll attempt to cover what is the bigger picture of a production and how to frame your mind for mixing, levels, avoiding things like over-compression and the dreaded dynamic range which even I struggle with. It is all in the planning!

Alex.

Saturday, 20 April 2013

Recording Sound - Experimentation!

The very best thing about recording sound is that you're not bound by what you can achieve. I've talked about quite a lot over the past few posts, regarding recording techniques and best practices. However, at no point was I trying so much at telling you what to do. This is more of a loose guide for recording techniques. I say loose, because you can pretty much do what you like, as long as it sounds good. The key is, it doesn't matter how you record it; if it sounds good, it IS good!

So to that end, always use your ears as well as your equipment. A good example of this is when it comes to the mixing stage and you're removing problematic frequencies: you can find the frequency graphically on your screen, but it's always best to fine tune which frequency by looking away from the screen and listening. Let your ears guide you! Mixing will come at a later stage though, this post is very much about recording - the first step in your sound journey.

The main consideration for experimentation is having the time. You won't have much time to experiment if you're on the set of something being filmed, or with the band in the studio, so make sure you take plenty of time to do it. Thankfully (aside from equipment and software cost/rental), it's free to record sounds. You can do it over and over to your hearts content. And if you don't have posh equipment, that's fine too! You can use whatever microphones you have to experiment, such as phones,  mp3 players, or even poundland PC microphones; my number one go-to when I started experimenting 5 or 6 years ago. Why not take advantage of that time and be a bit whacky? After all, the most famous of Sound Designers only found some very classic sounds by experimenting (a lot found by accident!).

Hitting Things
When I say hitting anything with
anything, I mean it.
The easiest way to experiment with recording is to hit things... with other things. You'll be surprised what hidden gems of sounds will come out of some household items when you hit them in the right way with the right item! And you can literally do it with anything; just point a microphone towards it and record.

For one of my final year modules at university, I actually do just that for a composition. The basis was, create a percussive or musical piece out of one or several ordinary objects. It was only when I came home one weekend that I had the idea of recording my brothers VW golf mkII! I was literally smacking things, winding windows up and down, slamming doors and the glove box, revving the engine. But the part that really sticks out for me was a spare exhaust part he had in the garage. It had a very bell like quality which was a lot more concise and 'singular' than I thought it would be. That is, there weren't any clashing frequencies that made it dissonant. So I suspended it from a guitar stand and whacked it with some drum sticks. Below is the entire piece I created for the module, and you'll hear the exhaust near the end, which is used as a bell/glockenspiel type instrument:


For all the sounds, including this particular one, I imported them into Kontakt 4 and used the built effects and loops to design the sound for the piece. The exhaust was the easiest really, just because I only had to detune it slightly to match middle-C, and the rest did itself. Love it when that happens!

Microphone Manoeuvring


Sometimes you can get a completely
different sound depending on the angle
This is where your possibilities for record become endless. I think the mistake a lot of people make when approaching the recording of a source is trying to get it in one position which sounds 'the best', and keeping it there for the entirety of the recording. Especially for sound design, I would always recommend trying at least a few different angles, more so for a source that is being recorded as a 'sound'; i.e. not a source being recorded to represent itself in music or film.

The item in the picture to the left is an electric can opener. Items like this are great for all sorts of clunks, machinery and a wide range of engine-type sounds. One may choose to record from a distance, which will exclude a lot of the lower frequency content and get that clunky small-machine type sound. However, if you put the microphone very close, you get a much deeper intimate sound, good for slowing down and using as ambience for a factory setting.

The below track contains several different clips of the can opener, recorded from different angles. As you'll hear, the sound changes can be quite dramatic, and would compliment many different applications of the sound. Below is a list (and illustration) of how each short clip was recorded:

1: From above, front.
2. From above, back.
3. From above, side. (Number 4
Was the mic in the same position
with the can opener pushed against
the mic stands leg)
5. Mic pushing activator down.
6. Mic pushed against back opening.
7. Mic pushed against side.

What really gets the experimenting going is when you combine this item with others to enhance the sound.

For example, placing the can opener on a wooden bench and then using a contact microphone to record the bench as the can opener is working, you get an aggressive bassy sound, because of the direct transfer of energy. Similarly, you can place it on a hollow structure made of wood or plastic, and record with a normal condenser inside; this should give a resonance to the sound.

This tool of sound was from
the Eden Project. Big boomy
sound!
Tubes are also a widely used item for changing the properties of an otherwise normal sound. Depending on it's size and shape, the sound will bounce around inside, which will exaggerate a certain frequency range. The smaller the tube, the higher the frequency. This is usually recorded from an open end.

You can also put a membrane on the end of a tube and attach items to this, which will create a unique resonant sound. The image to the right shows one such item, which has a long spring attached to a membrane on this tube (made of wood). The resultant sound, when the spring moves, is much like a rumbling thunder.

Sound tools like these are very useful if you're stuck on resources or time; they allow you to create sounds that would otherwise need to be taken from an SFX library, or need a lot of planning to record properly.

Below are 3 clips I recorded with the tube sound tool. The first clip uses the same microphone above: at the start, the mic is half way into the tube, and for the end of the clip, moved out but still facing the opening. The second clip is me pulling the spring tight against the edge of the tube, which is recorded from outside the opening and then inside. For the final clip, I found that shouting into the tube caused a spring reverb effect. However, due to the tubes resonance, you get some very interesting sounds at different pitches.

However, I digressed slightly from the original topic, but I thought it was worth noting.

Be Random!
Well, what else can I say? Just use your imagination! Seriously, the amount of times I came across a sound I needed by changing the angle an object was at, or rolling it on the ground, putting it inside something, submerging it in water, putting water inside it, putting my phone in developer mode to stick the vibrate on constantly and holding it against said item... You can literally do anything to get the sound you want!

Be Forth-Thinking
If you plan on using any of the sound you're experimenting with in a production, always always always think ahead about what the sound will be used for. If you're doing a film project that involves a lot of out-of-the-ordinary sounds, you'll more the likely have to slow down or speed up a lot of them, so record these sounds at a high sample rate (96kHz). This means the detail is retained when slowed down.

Also think about composite sounds. When creating a machine say, you won't usually have a single recording for it. You'll have layers, each creating different elements of the frequency content or components of the machine. For example, a bassy engine sound might come from the can opener. Then for movement, you may have a car starter motor ticking over and pitch shifted. Then for a robot-like voice, you can record your voice and play it back through a speaker, with the cone attached to a membrane on a metal tube, which will give it a metallic sound. See what I did there?

Conclusion: If you have a recording device, or microphone and interface, you have the tools to create endless sounds. Even with free software such as Audacity, you can pitch shift, speed up, slow down, apply EQ and multitrack to create and shape any sound you can possibly imagine. As long you let your ears guide you, the possibilities are endless. Go out there and capture some noise!

Next time, we'll get stuck into some simple post production bits - audio editing and optimising, simple EQ and making sure you get the most out of your raw sounds.

Alex.

Saturday, 13 April 2013

Recording Sound - The Room, Mic Placement & Gain

So there's your sound source. What's the most effective way of going about recording it? Todays post will go into the details of how important it is to consider the room you're recording in, where to best place your microphone and what levels are appropriate for what you need to get out of the sound. As we've covered the different types of microphones (Mic Choice Part 1) as well as their respective polar patterns (Mic Choice Part 2), we can incorporate how these will affect our choices of distance, angle and gain levels.

So why can't I just record everything in my bedroom? Well... you can. There's nothing stopping you getting the most out of the sounds you need with a reasonable representation, which can be enhanced in post production. However, taking some simple steps to prepare your room, or choosing a room dependant on the source can improve your recording immensely. Below, I'll go over what you might use for the appropriate desired effect on your recordings.

Dampened and Clean - If you plan to go the route of a reflection/reverberant-less recording that will allow you to add any and all effects afterwards, you'll want to use a room that is smaller and with as little hard surface as possible. The most typical setup for a studio recording is to have a reasonably sized room (4l x 6b x 3.5h metres) that incorporates lots of foam tiling for sound absorption and texturing that would reflect sound in all directions (to reduce reflections and possible phasing on microphones). There's no reason you can't get this effect at home though. A bed duvet pinned against the length of a wall will provide a sufficient amount of dampening. Some even choose to keep egg cartons and line their walls with them, which also helps. The thing to remember, which even I've forgot to consider in the past, is your floor and ceiling. These reflect sound as much as walls, especially when you have a laminate flooring. The easiest way to resolve this is by having carpeted flooring and the means to pin a duvet or carpet-like material to the ceiling, as well as your walls. And if you're budget can take it, definitely invest in some high-density acoustic foam tiles - you can easily buy a pack of these from ebay for £35/$55 which would be sufficient for even a professional environment.

Reverberant - It may be the case that you want to record your source with some natural reverb, which is perfectly fine if you know that this is the desired effect for your production. As reverb has unlimited potential in sound and effect, it's good to play around with this if you haven't had experience before. I'll go over a few examples and what they might add to your recording.
Music: If you're a guitarist who wants to have a huge reverberant sound for a lead solo part, you might want to have your amp and mics in a large church-like hall. The time at which the sound reverberates is usually between a second or two, creating a large sustained sound. This can also be true if you want a large drum sound, but i'd advise to have at least a little dampening to control this; otherwise, the sound isn't as precise, which won't help in the mixing stage.
Sound for TV/Film: A lot of sound effects and dialogue in this instance are recorded in a dampened/clean studio. However, you may not be able to bring a church bell or a huge crowd into your tiny recording studio. Instead, you can record them in their natural environment, or one which will reflect (pun not intended) the scenario on the screen. As long you perform some test recordings to ensure it sounds fine, you can save some time in post-production (as well as some CPU power from those plugins!).

Let's now consider the source sound. Much like with microphone choice, you have to understand how your source is creating sound physically, in order to find the best placement and gain level. For example, if you're recording an acoustic guitar, there isn't a lot of physical movement in the air apart from the musicians hand moving up and down to strum the strings. On the other hand, when you're trying to record a vocal, there's a considerable amount of air moving around with the singer breathing, shouting, as well as the troublesome popping caused by 'b's and 'p's. If you don't know what I mean, just place your hand about 2" in front of your face and say "Barry and Peter": you should feel the air shoot out more on the 'b' and 'p'.

Another consideration, especially for music, is how it may hinder the musicians ability to play their instrument. The worst thing you could do for any musician is to place a microphone or stand in a position that would mean they aren't comfortable and therefore can't perform in what should be their top form. From personal experience, this means microphones on drums that I would catch with my sticks when moving around the kit, or stands behind me that I would catch with my elbow. In short, always consider the musicians needs before placing microphones to get what may technically be the best sound; if they aren't playing their best, you wouldn't get the best sound from them anyway.

Linking in with musicians, but not exclusively relating to them, the proximity effect is also something you would need to think about. I say linking in with musicians, because the proximity effect can add a sense of intimacy with a vocal or guitar. I won't go into too much detail (as it's quite complicated), but due to the physics involved with the diaphragm and the short distance between the source and the microphone, a bass boost occurs naturally. You can test this yourself: just get someone to say a few words into one of your ears a few feet away, and then have them say it up close to your ear - you should hear it. This is used a lot in music and movies to emphasise a voice, but it's really up to you what you want to use it for: after all, if you use it and don't need it, you can (for the most part) EQ out the effect in post production.

-------------------------------

General Microphone Placement: I think the best (and only) way to describe microphone placement is through several different examples. These examples will work around a single instrument or source, and then detail different scenarios in recording them:

Vocals / Voice Over
As mentioned briefly, the human voice is quite varied in terms of both dynamic range and frequency. The way to work out the best microphone placement and gain is what you'll be using it for.
Music: I would always try and go for a studio-type acoustically treated room and have the microphone set up at mouth level with your singer. Generally you want the mic to be around 6" away. However, you won't have to worry about distance too much as an engineer, because the singer will (or should) move back and forth depending on the volume and effect. As with the proximity effect discussed earlier, they may move in to about 2", or for very loud singing, they may choose to back up to 8-10". Gain wise, you'll want to get them to sing a few lines repeated at as loud a level as necessary for the song or section, making sure the pre-fade level is touching about -3dB. This gives plenty of head room for short loud bursts. You can also consider the polar pattern, which would probably be cardioid to avoid capturing the room tone, but if you do want this, use a figure-of-8 pattern to control it.
ADR (Automatic Dialogue Replacement): This one has always fascinated me. I must clarify what this is first: all ADR is recorded in the studio after filming (hence dialogue replacement); this is common practice in many films. Basically, a film set is usually very noisy and, even though the sound is usually recorded regardless, you wouldn't get a seamless transition between shots. So instead, they record dialogue afterwards in a studio which gives them more control. So in terms of mic positioning, you want to try and record it as if you we're listening to them in the scene. For example, if they happen to be very close to the screen, you want quite an intimate recording similar to vocals as described above. If they're stood in the middle of a room a few metres away from the camera, you want to record them from a few feet away, usually above them. To get a better idea of this, just check out some DVD extras of films: Lord of The Rings has a dedicated feature on sound, and animated films usually have a section devoted to ADR (although not as direct as recording technique).

Electric Guitar/Bass
If you're either a guitarist of bassist, these tricks are so easy for you to have a mess around with. Both are pretty much the same, but guitars amps tend to have a slightly more direct sound from the speaker.
Live: When you don't have much control over where the amp goes, you tend to have to put up with what you have (especially in smaller venues). If you can, try and have the speaker unit in a reasonably open space with the back exposed; otherwise, you'll get exaggerated peaks and troughs in the bass frequencies. However, the key to remember for live sound is that you will never have as much control as the studio; always concentrate on suiting the sound for the venue. So moving back to the guitar amp; if you have a single cone, place your dynamic mic facing towards the centre of the cone, either directly or at a slight angle. If you have a 4/6 speaker cab, pick a cone and mic it up the same way. After all, you'd expect the amp/cab to be doing most of the work.
Studio: Because you will have more control, you can be much more specific about your mic placement to change the sound to your needs. The best way to find the guitar sound you want is to work out where it will lie in the mix. Are you recording a rhythm part? Is it a scorching solo? Fat power chords? All of these encompass different microphone positioning, because moving the mic around the speaker cone can dramatically alter how the recording turns out. The centre of the cone is where you get a very precise sound because it's where the most movement occurs. On the other hand, the edge of the cone is where the least movement occurs, so you get a bassier rounder sound with less high frequency content. Therefore, if you want to record a rhythm guitar part for example, you'll want to keep the microphone away from the centre of the cone so it doesn't take all the attention in the mix. Similarly with a lead guitar part, you want to place it in the centre to capture as much of an intimate in-your-face sound as possible.

Loud One-Shots
This one isn't very specific, but describes basic technique for anything in the nature of loud sounds that could potentially cause distortion. One particular example is fireworks. They have a whizz and then a very loud short bang. I'd say record the firework from a normal distance (8-10m) and follow the firework with your microphone; swinging it upwards as it lifts off. Gain wise, I would recommend keeping it low for a test recording, check what level came out and then alter accordingly. If it was recorded right, you'll have a very quiet whizz and then the bang heading towards 0dB (ideally -0.5dB). If your recorder has a very low noise profile and there isn't too much back ground noise, you can use a transient designer to bring out the whizz and tail of the bang which will make it sound a lot sweeter. More on that in another post though!

Traffic/Public/Machinery
This all lies on the application you'd use it for. For sound and film (or music if you chose to include something like that), recording in stereo in the best way to go about it. If it's not the focus of the mix (which is usually the case), you can always get away with recording 2 mono tracks and summing them to stereo panned hard left and right. For games which would use point sources, you can either record in stereo and sum to mono/split the tracks, or record in mono. This is especially important for ambience which I'll detail in a later post when I get to game audio implementation in UDK.
Regardless of this, if it's background noise you want, try and record the sound from a distance. With the public, this is vital, as the listener is drawn to the human voice and a particularly apparent one will stick out like a soar thumb. Mic placement is pretty simple: just point it at the crowd; for gain, keep it at about -3dB so you get a healthy signal if possible. If you're pushing your recorder though, back it off a little to avoid a high noise floor, as you'll more than likely pull this sound down in the mix anyway. I'd also recommend a cardioid polar pattern, as hyper-cardioid may be too precise for a 'crowd' sound, where omni-directional wouldn't give you much control over what you were recording.

Conclusion: Microphone placement and gain is a bit of art in itself. You really have to be forward-thinking and reflective, based upon the image you're portraying or the overall mix. As long as you have a good plan, you should be able to make the right decisions. And before I forget, I would go over Drum mic placement and gain, but I think that's big enough for it's own post! So I'll leave it here for now.

Thank you very much if you've read this far, it was a big one today. Next time, we'll go over some experimental things and the endless possibilities of recording your sources! I'm rather excited about this one I must say...

Alex.

Sunday, 7 April 2013

Recording Sound - Microphone Choice [Part 2]


Click here for Part 1

Coming straight from part 1, there's a little more to learn about microphones. Obviously, we now know that dynamic microphones are great for high volume sounds, where as condensers are great for their dynamic range and sensitivity. What we're going to touch on next is the variation in sizes and shapes, as well as the 3D pattern at which sound is picked up relative to the diaphragm.
Rode NTG-1 with a smaller
1cm Diaphragm

Microphones are designed to receive sound. However, The way in which this is achieved varies widely depending on the size and polar pattern of a microphone. So what does this mean? Well imagine a set of speakers. The speaker cones come in several different sizes to help represent the broad range of frequencies. Tweeters are usually about 1" in diameter and deal with anything from 7-22kHz, with 4-5" cones handle the mids at 400-6Khz, which leaves large 10" cones that will delivery the very deep 20-300Hz range. This is no different for microphones.
AKG C414 with a larger
1" Diaphragm

The best way to think about this is setting up and recording a drum kit. The first part you may want to mic up is the snare drum. As the frequency range tends to be low to high mids (500Hz-5kHz), you won't need a large diaphragm microphone in order to fully replicate the sound realistically. Similarly, you won't want to use a pencil condenser microphone with a 1cm diaphragm; this would be more useful on the cymbals which create a lot of those higher frequencies. For the kick drum, which has a fundamental frequency ranging from 50-200Hz, the diaphragm on the microphone would need to be much larger: about 1" for most proprietary kick or condenser microphones. Some may even want to convert a medium sized speaker cone into a microphone, which would be able to pick up the sub frequencies of the kick (20-60Hz). However, I digress: can you tell which instrument I play yet?

The point is, before you pick a microphone, consider the frequency range that the source will be creating, or at least the frequency range that you'd like to use.

Now, polar patterns. Have you ever wondered why microphones are the shape and size they are? Why some are long and thin, where others can be cuboid-like or have the diaphragm exposed on 2 sides? These different designs have all been implemented for the purpose of creating a pick up pattern; better known as the Polar Pattern.

The Polar Pattern is a 3D shape (usually depicted in 2D) that highlights the area around a diaphragm that can pick up sound. There are 4 main patterns available for microphones, which are described below:
Omni-Directional Polar Pattern
credit:wikimedia.org

Omni-Directional - This is the simplest pattern available for a microphone and is the most basic to understand: it picks up sound from all directions equally. You can imagine the pick up pattern as being a large sphere around the diaphragm. This pattern can be found on a lot of vocal microphones and as a choice on many higher end condenser microphones.

Uses: As it works to pick up everything, it tends to give the most realistic representation of the sound, with both the source and reflections on the recording.


Cardioid Polar Pattern
credit:wikimedia.org
Cardioid - This pattern, much as the name may depict it to be, is shaped like a heart. Rather than picking up sound from all directions, it's only able to reach sounds on one side, with minimal 'leakage' of sound from the back. As you can see, there is a small amount from the rear, which is only due to the nature of a diaphragm being effected from either side regardless; for the most part though, this is a single direction pattern.

Uses: This pattern is particularly useful in both live and studio settings, where sound leakage may want to be avoided. For live purposes, you'll want to prevent as much leakage from other instruments as possible, so recording in this single direction very much helps. Similarly, if you want to record in a studio with as little reverberation as possible, the cardioid pattern should help with that.

Hyper-Cardioid Polar Pattern
credit:wikimedia.org
Hyper-Cardioid - Coming directly from the previous pattern, Hyper Cardioid is almost an exaggerated version of Cardioid, which is far more directional, leaving even less leaked sound or room tone to affect the source sound. However, what it gains in it's precision it looses in it's mono-directionality. I.e the pattern turns more into a figure-of-8 shape, which means sound is picked up from the rear. This shouldn't be significant enough to burden a recording though, especially with higher end microphones.

Uses: As this provides a more precise directionality, it is usually used for broadcast recording. For example, a lot of shotgun condenser microphones (such as the NTG-1 shown above) use this pattern so that the newscaster, who may be stood outside of a building or built up area, is picked up clearly at a distance without too much of the external noise being picked up.

Figure-of-8 Polar Pattern
credit:wikimedia.org
Figure-of-8 - Most common for condenser microphones which are exposed either side, figure of 8 is a fairly self explanatory recording pattern: sound is picked up equally from either opposite side of the diaphragm. By having this, two sources can be picked up either side of the microphone, without a large amount of spill that would otherwise occur on an omni-directional pattern. Similarly, a single source can be recorded, with a controlled amount of room tone to the desired effect.

Uses: One good example I read about recently was to use this pattern with a guitar amplifier either side of the microphone, with one guitar split and wired into both amps. As the distortion would be slightly different on either amp, this would create an almost doubled-up effect, which is naturally summed from either side of the mic to create a huge guitar sound. Also, for a lot of vocal work, you may want to record 2 singers either side of the mic for again the doubled up effect which is good for a pre-chorus emphasis.

Conclusion: These ideas are relatively simple to understand and are mostly common sense. However, knowing these simple steps and querying what your own microphones have can really change how you think about recording. Making sure the frequency response and directionality is accounted for can improve recordings greatly, especially with a combination of microphones and their respective polar patterns.

Next time, we'll go into the placement of microphones in relation to a source to make the most out of your recordings, as well as how multiple microphones can have adverse effects due to phase, with simple solutions to resolve this.

Thanks again for reading!

Alex.