Sunday 1 September 2013

UDK Audio Tutorial 2: Soundcues

Introduction: In order to start creating and implementing game audio in your level, there are several elements of the Unreal Development Kit that need covering. Not least of these is the humble Soundcue; a file that references one or many sound files for designing smaller contained systems.

NB: I did say in my previous post that I was covering soundcues, kismet, matinee and more here, but on reflect, it seems that all of those together would be FAR too much for a single post. I'm therefore splitting them down, starting here. Oh to be naive!

Importing Audio into the Content browser: Before I can detail Soundcues, we'll need some audio to use in them. To do so, we simply need to import some audio files. However, this might not seem so straight forward at first glance; it's actually easier than you think.

A small note: If you're interested in best practices for audio editing sounds for games, see my previous post here.

To import audio, you'll need to be in the content browser.


From here, click on the 'Import' button in the bottom left of the window (shown right). A windows explorer dialogue will come up, for which you'll need to navigate to your audio file. Don't worry: once you've found the location once, it opens up in that same spot the next time. It's important to note here that only certain file types will be accepted. The easiest and most widely used format is the '.wav' format. As anyone in sound will know, this is the definitive uncompressed file type that's size reflects the quality - especially in game audio, you need to keep on top of this. However, I'm digressing into memory constraints; on with the plot!

The next screen you'll see on choosing an audio file is the import window: this is where you'll choose the package in which the file will be saved, create an optional group and finally name your sound file. The package in this instance is a physical file that will be saved on the disk. The group is a folder inside this package, used for better organizing your files.


Naming Schemes: A very important rule to work by is a set naming scheme for your files, not just audio. The purpose is to help keep everything in the editor organised and give an at-a-glance view of file types (purpose of use that is, such as footsteps, brick wall textures etc). If you have an inconsistent naming scheme, files can get lost and (more importantly) work flow can be broken.

Personally, I favor the single letter groups and underscoring scheme. For example, if I had a sound file for a single footstep in snow, I would start with 'A', as it's an audio file, then 'F' for footsteps, then 'snow' and optionally a number if there were variants. this would therefore read 'A_F_snow1'. Another example would be for a light brown brick wall texture; this would read 'T_B_LightBrown'. Others may not use this scheme, but it's my personal preference.

After you've filled everything in and clicked OK, your audio file should show up in the content browser - success!


You'll notice that, once imported successfully, there are a few '*' characters dotted about the place. This means that a package has been edited in some form and requires saving. By looking at the bottom-left of the content browser (shown left), you'll see your new package, also with an asterisks. To save this, simply right-click and save, bringing up another windows exlorer dialogue.

Naming and location of this file is as important as your internal naming scheme. What I like to do is create a new folder inside the one used for your level. This way, you'll have all your assets together. For naming the package, I used the same scheme as before; 'A_Footsteps' in this case. However, you can choose to save all audio in one package, or split it down even further - which ever you're more comfortable working with.

The Soundcue: One of the beautiful things about UDK is it's level of detail for audio implementation, while also keeping things simple and easy to use. One such element of this is the Soundcue.

What is a Soundcue? - Simply put, a Soundcue is a file that refers to soundwave files in order to implement them in the engine. Moreover, it's able to manipulate the audio files, creating small systems in themselves to achieve a much broader complex system as a whole.

Why do we need a Soundcue? - There are 2 main reasons to have these Soundcue files. First of all, they can help shorten the programming time drastically - using object based design, you can quickly add modules and link them together, giving realtime feedback. Secondly, Soundcues will no doubt be referred to throughout the level, especially for SFX such as doors opening or elevators. If the sound for these objects were design and implemented individually for each individual occurance and you change your mind on how the sound works, it would potentially take hours to go round fixing them all, let alone keeping track. However, with a soundcue, you can change it once in the content browser and all references will be changed as well, saving valuable time.

What can a Soundcue achieve? - There are a surprising amount of systems you can create with what seems to be such a simple tool. there are quite a selection of modules to choose from, which leaves a lot of room for creativity. At the end of the day though, it's up to you: you can use them simply for triggering a sound, all the way up to concatenating random dialogue to create a unique randomized sequence every play (more on this system later though...).

Creating the sound cue: this is a very similar process to importing audio into the content browser. However, rather than using the 'Import' button, we're simply going to right-click in the empty content browser space (next to where your audio file is) and select Soundcue from the menu. This brings up the same prompt for importing files, asking for a package name, group and file name. I like to use the same package as the audio, but I choose to put cue's in the parent directory (not grouped). This way, I can see all of them at a glance, rather than searching through each group in each package. Again, this is a personal preference; you may want to do otherwise.

Naming is of course important here as well. The simplest way I find for naming is adding 'Cue' to the end of the audio file name. For example if the audio file was 'A_S_BombExplosion', I would name the cue 'A_S_BombExplosionCue'. Similarly, if you have multiple audio files for the same cue, such as 'A_F_Snow[n]', I would replace the number [n] with 'Cue'.


Now your soundcue is named, placed and saved, you can go ahead and open it up. What you'll find is actually a blank canvas (shown below). The 'speaker' on the left is the eventual output of the soundcue. Everything leading up to it is what makes up the system.


To add your audio file into the sound cue, first open up the content browser and make sure your sound file is selected (yellow outline). Then go to the soundcue, right-click anywhere inside it and select the sound file at the top of the list. You'll be left with the file as a module, shown below:


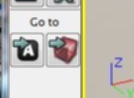
However, we can't just leave it here, as the soundcue still doesn't have an output. We'll need to 'connect' the modules so that a flow of data occurs. Don't worry though, it's very easy: just drag from one of the small black blocks to another and there you have it! A functional soundcue. To make sure it works, press the right play button (shown right), which will play exactly what would occur if triggered in the game. The other play button plays the soundcue at whatever module you've selected.


The Functions of a Soundcue: This is where it gets interesting. Not only is there the fact that you can achieve quite a lot with a soundcue, but because it works in a flow-chart-like manner, modules can be combined, giving us a huge potential for creative use.

I've used 90% of the available modules in my work, so they're all very useful. Best of all, they're so easy to use! Like I showed you: it's a case of connecting modules together and listening to the outcome. Of course, you can go into more detail with their properties. For example, the 'attenuation' module has editable parameters for min and mix distances of attenuation.


The following provides a more detailed explanation of each module in the soundcue editor. However, as I mentioned, I haven't used them all so I'm going to detail the ones that I know well. If you do want to find out about the other 4 modules, feel free to go to the UDK website.

Attentuation: Apart from any sounds that need to be locked in pan and volume (such as first-person SFX or dialogue), most sounds will require attenuation. What this achieves is a basic distance-volume relationship - the further away you are from the source, the quieter the sound. Another tool within this modules is spatialisation - also key for most sounds, but not the ones listed before. This is the act of sound panning based on perspective, which means that if the source is to your left, it will be panned left. Finally, we have the facility to apply a LPF (low pass filter). If enabled, this will both attenuate volume and gently roll off the higher frequencies with distance.

Attenuation and Gain: Almost identical to the Attenuation module, this simply adds the ability to control more the gain of the source with regards to distance.

Concatenator: Very useful for dialogue, the concatenator is used to 'stitch' audio together to create the illusion of seamless audio playback. When combined with multiple randomised files, you can very quickly create unique SFX with very little memory usage.

Delay: This is as simple as it sounds - it adds a predetermined (or randomised depending on a min and max time) delay before the next module.

Distance Crossfade: Particularly for static ambience soundcues, the distance crossfade allows you to have a 'distant' sound looping, until you get to a predetermined distance where by the sound fades into the 'close' version of the sound. Obviously, you would need to create these near and far version of the audio, but it's a great time saver for a much more realistic outcome.

Doppler: More for when a sound passes the player rather than the other way around, the doppler module adds the pitch-bend effect that occurs similarly to when a car drives by. This must be a recent addition because in all my previous work, I'd never seen it!

Looping: Exactly what it says on the tin - this module loops a sound. You must be cautious with this one though, as you have very basic control for stopping and starting the loop. This is best for a sound that will always loop, such as an ambience.

Mixer: Much like a mixing desk, the mixer allows you to change the volume of multiple sounds irrespective of the overall soundcue volume (controlled in the properties window). A very useful tool when creating SFX or loops with multiple layers.

Modulator: The key to creating repetitive sounds seem non-repetitive is modulation. This is the act of randomly altering the volume and pitch is small variants to give the illusion that one sound file seems like multiple. Great for foley such as footsteps, as well as gun shots, explosions, doors opening and closing etc.

Continuous Modulator: This works in a similar fashion to the attenuation module, which is technically also a continuous modulator, only that attenuation uses the distance and displacement as parameters. An example of continuous modulation is a car engine. When the speed gets higher, the pitch goes up, and when the speed goes down, the pitch goes down. This happens continuously, as there is no need to 'trigger' the car going up or down in speed. Similarly, with speed changes, the volume might increase slightly when in first gear, then will jump back down when up to gear 2.

Oscillator: Oscillation is the constant alteration of values between and a min and a max, usually in a predetermined fashion such as a 'sine' wave or 'saw tooth'. In this case, we can use the oscillator to alter the volume or pitch of a sound. An example might be a siren going up and down in pitch, or the waves at a beach going up and down in volume as they swell and subside.

Random: The mother of all modules: random is the most useful tool in my opinion. It's function is to randomly select from a group of sounds connected to it, either with or without repeating itself. Especially in game audio, you want to prevent repetition accordingly, and randomising files is the first step in doing this. Coupled with modulation, you can very quickly have professional sounding results.

Example Soundcues: the best way to show these modules in use is through example. Below, I've put together a list of systems that I've used, how I built them and why I've made them as such.

Randomizing footsteps - This is a staple system for any game that involves a character that walks. What you want to achieve is as little repetition as possible, unless designed otherwise (the japanese tend to have repetitive footstep sounds for style). The reason we want to prevent it is that you'll be hearing them a lot. No one wants to hear the same sound over and over for hours on end, so we do everything in our power to prevent them breaking immersion.


Above, you'll see a system that I've mentioned a few times. Here, you'll see 4 sounds being referenced on the right which are individual footstep sounds; that is, a single foot. These are then fed into a random module, which both plays them out of any repeated order and makes sure a single sound isn't played twice successively. Finally, the output goes through a modulator which alters the pitch and volume to further prevent repetition.

We could take this one step further by including a scuff sound when you catch your shoe on the floor rather than a full step sound. We could also split the footstep sounds into 2 (the back of the shoe and the front of the shoe hitting the floor), which would create an almost lack of repetition.

Cross-fading a Waterfall - It's very easy to create a waterfall loop out of a single sound file and have it attenuate with distance. As anyone knows, a sound almost develops the closer you get to it and certain features (such as splashing on rocks) fade in that weren't apparent at a distance. To solve this, we can have 2 separate sound files looping, which are faded between the closer or farther you get.


What we have here are the two sound files (right), named accordingly for the 'far' sound and 'near' sound. These are first fed into the loop modules, making sure the files aren't interrupted. Finally, we have the Distance Crossfade module. Within the properties (right), we can adjust the distances intricately, so that the fade is to your preference.

You're also able to add more inputs to the module, meaning you could have 5 or 6 different sounds crossfading all within this soundcue. One use for this could be a weapon firing, which has several layers of the same sound that performs differently depending on the distance. Close up, you would get a very bright and low-end burst, with another layer that has less lower frequencies at a further distance, a third layer which brings the top end off and a slight delay further again, and finally a layer which is particularly dull for a great distance.

Dialogue Randomisation and Concatenation - In preventing repetition, there are issues in all aspects of audio, including dialogue. When you have a lot of NPC's, the volume (pun not intended) of dialogue can balloon and before you know it, almost half the games memory can be taken up with it (just take a look at any Bethesda game post-morrowind). The system below is a way of resolving part of this issue.


What we have are 3 instances of dialogue, with 2 of these instances randomised each time the soundcue is activated. First, we have a single line of dialogue, which feeds directly in to the concatenator. the second section uses a few different modules: there are 3 variations of the line to be used, of which one is picked at random. This is then fed into a delay, which is used to give a natural pause between this and the first line. Finally, we have the same setup for the third line, only with 2 variations rather than 3. To those who wouldn't know, the outcome would sound like a single audio file.

More Next Time...: So those were 3 examples of the kinds of systems you can achieve with a soundcue. I hope it gave you an insight into what is only a small part of what makes up audio implementation in UDK. However, I'm not really finished yet. Next time, I'll be covering Kismet, which is a whole different world in itself. With it, I'll be showing how we'll be able to trigger and manipulate these soundcues. A very satisfying part of the process I can tell you!

Conclusions: As I've just said, this is only a small part of the audio implementation that's available. I could go a lot further and certainly a lot deeper, but I could go on for far too long. If you're planning to get into this, have a good play with all the modules; some you won't be able to use properly until they're in-game, but implementing a rain sound from single raindrop sounds that are chosen randomly, concatenated and looped is a good challenge.

At any rate, enjoy having fun with this and I'll be back shortly with the fun of Kismet!

Alex.

Monday 26 August 2013

UDK Audio Tutorial: Introduction + Basic Level Design

Introduction: For me, there is nothing more fun and rewarding than creating interactive audio. Not only are you making something sound good, but you're allowing others to take this and make it their own - something that other mediums of sound simply can't achieve. From recording, to editing, to mixing and finally building systems, the process is varied and satisfying. Here, I'll be going through everything you need to know about creating simple sound systems in UDK.

Before I get straight into it, I've detailed below a list of the kinds of things I'll be covering, from the basics on to more advanced subjects:
  1. Getting to know UDK: Basic Level Design - In this first post, I'll be covering the basics of the Unreal Development Kit and tools to create simple levels using the builder brush.
  2. Getting to know UDK: Soundcues, Kismet and the rest -  In the content browser, we'll go into setting up internal sound systems that act independently, and why they're important for workflow. Also using kismet, I'll implement some simple systems, while explaining some key modules that are useful for all aspects of interactive sound design.
  3. Setting the Scene - the most basic use of sound in games is ambiance, or setting a 'sound background' for all other sounds to sit on. I'll explain how to create them and best practices for volume, frequency and content.
  4. Music - Another key element of a games sound is it's soundtrack. The way in which this is implemented varies from game to game, so I'll cover a few instances.
  5. Foley - The little details certainly create a bigger picture, especially in audio. I'll create some systems and discuss audio file creation, lengths and frequency to help make the most of your recordings while making it appropriate during gameplay.
  6. An Interactive Environment - Using everything detailed in previous posts, I'll create an interactive environment that I'll make available for download so you can interact with it too!
As I write these posts, they'll probably evolve and more things will be covered than first planned, so expect to see more than just 6 posts. I could do 6 posts alone on foley!

Getting to know UDK

Before you can create your soundscapes, it's good to get to know your tools. One of the things I love about UDK is that it's relatively simple to create block worlds quickly with playable results without a huge amount of prior training. You can also work out systems that would otherwise entail coding, instead using object based design in 'Kismet' (which I'll be using for our sound systems). All in all, it's very user friendly and is completely free to design games in, so it's a sure fire for any beginner in whatever aspect of game design you'd like to persue.

Installing UDK: In order to download and install UDK, simply go to the UDK Download Page and get the July beta (I'll be using July through these tutorials as it was the latest at the time of writing). The process of installing is as you might expect; the only questionable section is the perforce installation. You can go ahead with this if you choose, but I won't be using this in the tutorials. For more information on Perforce, check out their website.

Opening UDK and Creating a New Level: When you first open UDK, you'll be greated with 3 windows:

What you'll be greeted with when UDK loads up.

The main window at the back is used for the level design and physical placement of items. The second window from the front is the Content Browser: this contains all of your assets, such as meshes (items that can be placed in the world), textures, animations and sounds. Finally in the foreground, we have the start up window. this gives you quick access to the creation of new levels, opening existing levels, video tutorials and more.

The other important window that we'll be using quite a lot is the Kismet window. As discussed, this is used for creating reasonably complicated systems using object oriented programming. An example of this is shown below:

An example of a kismet system. This particular one reduces your health by 5 every second if you're within a set radius of an object.

So why cover level design tips for an Audio Tutorial? The thing that sets game audio apart from creating a song or designing sound for film is that, if you don't have an environment to work with, you can't really create the systems necessary. Now you may say that without film, you can't create film sound, which is a valid point. But it's so easy to create a simple game level, that it's not worth overlooking. When I started my interactive audio module at university, the first thing we were taught was basic level design, as it gave us much more freedom and flexibility over the systems we designed. The other advantage to knowing these techniques is the breadth of tools it introduces you to, which gives a much broader picture of game design as a whole. If you're already adept with level design, you can of course skip this post and go straight onto the next one, detailing kismet and other elements.

For this tutorial, we're going to start by creating a new map. You'll be greeted with a choice of new maps, 4 of which include a basic floor and static-mesh block with a different time of day for each, with the last being a blank canvas. To make things easier (as I'm not covering much level design), we'll just go straight into a pre-built one.

Here, you can choose a pre-made level, or start with nothing.

The first thing you'll see is the 3D view. This is used to view a close representation of what your final level will look like, including any invisible volume and nodes. We can hide and show a plethora of different features so you can find exactly what you need.

The main editor window, with a pre-made level loaded.

However, to really help with workflow, were going to show the other views. By clicking on the button in the top right corner (shown below) 3 other views will be shown. These provide a texture-less perspective from the top, front and left side of your level.

With this view, you can see a 3D adaptation of the level, as well as 3 perspectives with texture-less models.

Creating a Simple Block Level: The best tool for the job in creating a level is the builder brush. This is used simply to create blocks of varying sizes and shapes, and can be manipulated using various methods. For our level, the builder brush is currently on the cube in the middle. Clicking on the Go To Builder Brush button (shown right, right button) will take you to it (no matter where in the level) and will automatically select it.

The Builder Brush can be changed into many shapes. You can see these on the middle-left (turquoise coloured buttons).
Here, I've simply moved the builder brush out of the cube. As you can see, it's a texture-less entity which gives an outline as to the shape it will create; you'll also see some controls in the centre. For everything you select in the editor, a set of controls will appear to allow manipulation, for which there are 3 kinds available - Displacement, Angular and Scaling. A forth is available, which allows you to scale an object separately in the x, y and z axis.


Have a mess around with these tools to see what kinds of cuboids you can get. There are also preset shapes you can use, detailed in buttons on the left-side toolbar, such as spheres, cylinders and stairs. Once you have a shape you'd like, you can then create a static object. The quickest way to do this is by pressing Ctrl + A. As you'll see, the area is filled with a blue and white checkered block.

The builder brush defaults the created object to have this texture and stretch it across each plane. You can however change these textures and methods of application in the texture properties window.

You can now move the builder brush around and create more blocks the same way. Another great feature is the ability to cut out holes in these blocks. In the below screenshot, you'll see I've simply changed the angle of the builder brush and 'subtracted' this area from the one created previously. You can achieve this by pressing Ctrl + S.


I use this feature a lot for creating doorways and windows, but as you might imagine, it can be used very creatively even for such a basic element of the engine. It's a very quick and easy way for drafting a level which will aid in the design and implementation of systems.  Below is an example of something we can use for a building with exterior and interior walls, an entrance and an exit.

Of course, you can intersect these blocks if you wish. This makes it easier to prevent unwanted light leakage or stopping the player from becoming stuck in gaps.

When you're happy with the layout of your blocks and want to have a play-test, all you have to do is press the green play button at the top of the editor window and you're in. You can run around and view what is the start of your creation!

This particular screen has had a full lighting refresh - a process of rendering which you can do in the 'Build' menu. By doing so, the engine reads the lights refraction's, giving a much more realistic look to your level.

More uses of the Builder Brush: It's great fun to create these levels with the builder brush. However, it's much more powerful than this, and you'll find yourself using it for much more than physically building blocks. A lot of the use will be for volumes: trigger volumes, water volumes, reverb volumes and many more. Each of these have a distinct function to help you design systems and gameplay. Particularly though, trigger volumes will be used more than most for setting off the sound systems I'll detail in coming posts.

This is what a trigger volume looks like. In a later post, I'll be hooking this up to a system in kismet as the start point, or trigger as such.

Static Meshes from the Content Browser: Another way of 'furnishing' your level is with the use of static meshes: these are complicated textured 3D models that are anything from a door, window, table, engine, car; basically any object that isn't created with the Builder Brush. These are stored in the content browser, and can be found by using a filter tick-box at the top. To put them in your level, you can either select the object (which will stay selected even if you close the content browser) and right-click in the level to add it, or you can simply drag it in from the content browser.

In the content browser, clicking on the 'static meshes' tick box reveals all the static mesh files available.

Here, I've added 3 of the same static meshes; barrels in this instance. The medium sized one is the original, with the other 2 scaled appropriately and angled slightly. 

Conclusions: So that just about covers basic level design without getting too much into more complicated systems. I will carry on level design slightly in the next post, covering matinee (the tool used to animate objects) and integrating it into Kismet. Mostly though, I'll be going over Kismets many different modules and how I've used them in the past to overcome certain challenges (namely footsteps!).

Please don't forget to contact if you have any questions or would like to add anything; I very much appreciate your feedback!

Alex.

Monday 19 August 2013

Editing and Mixing Sound: Frequency, Volume and Content

From a large action sequence to a subtle conversation, a huge amount of thinking and planning goes into the sound design to create an engaging, believable and pleasant listening experience. Not only does pacing need to be accounted for, as well as which sounds are needed, but considerations for the frequency and volume are paramount to getting a good mix.

Let's take a couple of examples, mentioned above; an action sequence and a subtle conversation. These are both quite distant in terms of content and frequency, and must be planned thoroughly as such. I'll break each down into relevant components so it's easier to account for.

The Action Sequence:


Set the scene: Let's take a place of action similar to one of the fight sequences in 'Inception'; it's raining, there are many cars driving around with 3 or 4 chasing the main characters in their car. Of course, these cars are crashing into other cars and objects, while the 'henchmen' all have guns of varying power, attempting to kill our protagonists'.

I must first stress something - this is only one of many ways to go about designing, composing and implementing the sound for a scene, regardless of it being an action sequence. It's really up to the director and the way he wants to take the action, or the Lead Sound Designer who may have a particular vision or style. A lot of other films might have had fast paced music over the top of this, but Richard King (the Sound Designer behind Inception) went with a more dynamic approach; bringing forth a much higher impact than if designed otherwise.

Break down into layers:
  • Ambience - Throughout the scene, rain is falling fairly heavily. However, you'll notice the sound is particularly low in volume. The reason for this is to help enhance the dynamic range, which (as stated previously) in necessary for the impactive sounds. In fact, the ambience will likely be taken out at sections where the sound gets busy (crashing, gun fire, louder sounds in general). The same goes for the section where the train appears. Just before this occurs, you'll notice the dynamic range is heightened by leaving only the ambience in at a low volume before the train crashes into the initial cars.
  • Dialogue - Although there isn't much in this section, the dialogue is seemingly set back in the mix, which is another device to increase the impact that crashing and gun fire has.
  • Foley - This is a part of the sound that takes some picking and choosing. Much like a camera can focus on one part of an image, sound (when designed effectively) will do the same. If there is a man walking in the back of a shot out of focus, you generally wouldn't place footsteps on him. Similarly, if 5 or 6 people are shooting guns, but the camera is focus on a particular person, the sound would be mixed towards this person with their gun being loudest and possibly even leaving the sound out altogether for some of the other guns.
  • SFX (explosions, crashes) - In this scene, explosions, crashes and gun fire certainly take precedence. My way of thinking about a mix is to concentrate on the loudest and most prominent sounds, and then add other sounds around them. This way, you get a sense of perspective and shouldn't make too many mistakes in the way of bringing down the dynamic range.
Frequency Content: There are quite a lot of thing going on here. One thing is getting the sounds in, synced and mixed in volume, but making sure they don't clash in the frequency range is hugely important.
Let's consider the ambience first of all. This sets the initial scene, much like a backdrop at a theatre will do. However, you wouldn't have any bright objects or 'loud' images on this, as it would take the attention away from actors and props on stage. So in terms of frequency, you need to leave quite a lot of room for other sounds to happen, such as dialogue, foley and SFX. Therefore, you'll want a low-to-mid range frequency band - this leaves room for low frequency explosions, mid-to-high dialogue and the high-frequency chinks of bullets landing on the tarmac. In short, you'll want the ambience to accommodate all the other sounds; surround them, fill in the gaps.
Dialogue and foley will have a similar frequency range, but different from other scenes or mediums. These would usually take up more of the lower end, taking advantage of the proximity effect in Dialogue or intimacy in foley. However, for this type of scene, any lower frequencies would be EQ'd out (or recorded as such) to leave space for explosions and gun fire.
I've said it enough already, so let's finally get to SFX. These will take up the largest range of frequencies, as the breadth of SFX is quite large in this instance. Explosions, for example, will take up the majority of the lower end, with car crashes similarly lower but with higher crunching sounds layered over. Car engines would usually take up the lower end, but with so many short bursts of lower frequencies, they've designed them to take up more of the mid range. Gun fire will depend on the size of the weapon: hand guns have shorter low-to-mid bursts, with automatic weapons taking up more of the low end.

Fluctuations: As with an overall film, a scene can have fluctuations of frequency content, as to 'fill out' any gaps. For example, I said earlier that cars take up the mid range more here, but for some shorter sections, the frequency tends to the lower-mid. They can get away with this because of so many cuts and perspective changes image wise.

The Subtle Conversation:


Set the scene: As a big fan of the show, I suppose it wouldn't go amiss to use a scene from The (American) Office as an example of subtle conversation - there's certainly a good amount of it through the entire shows catalog of episodes, ranging from whispered chats to shouting battles.

Break down into layers:
  • Ambience - In this instance, ambience takes up quite a lot of room in the mix. In a way, the ambience in The Office is very much a character in itself. That is, it sets the scene and changes dramatically depending upon the circumstances. Most of the time, it's made up of fans and air conditioning, layered with SFX (detailed below). As there isn't much going on in the way of needing a huge dynamic range, the volume is brought up right behind the dialogue, and fills out the remaining frequency range (more on this later).
  • SFX (Copier, Phones, Doors) - These SFX are placed strategically and help further set the scene and create a 3D space around what you see. In fact, this is a great example of sound continuity. When the camera is facing one way, there will always be something going on around and behind it. These SFX are placed almost as jigsaw puzzles to complete that picture. See someone walk off camera towards a door? The designer will carry on the footsteps and use an opening door sound to signal and bring closure to that movement. Back to the point on hand though - the levels tends to be reliant on how far the objects are from the camera, which gives a sense of depth to the room.
  • Dialogue - For intimate conversations, Dialogue takes more priority than any other sound. Here, the volume tends to stay at a similar volume (regardless of speech type such as whispering or shouting). When the camera is taking a close-up, the proximity effect is utilised to give the sense of intimacy through sound.
  • Foley - In some cases, the foley can take as much precedence as the dialogue in terms of volume and content. The Office, as you might imagine, involves a lot of phone, keyboard and paper handling. These sounds are therefore quite high in the mix and are used as focus tools. For example, some scenes don't have a lot of dialogue, and use the foley to tell a miniature story. This can anything from someone pretending to read a magazine while spying, or Kevin eating a cupcake.
Frequency Content: For The Office, there are some distinct differences in the frequency ranges of each component, but they fill the same gaps for the most part. Of course, the only change here is that there aren't any cars crashing or guns firing, so there's little need to take up that lower frequency range of 60Hz and lower (unless someone punches a wall...).
Ambience now takes up a much larger part of the frequency bandwidth, with more lows and low mids that would otherwise be used by explosions and gun fire. Dialogue varies widely now, with shouting from afar being similar to the action sequence (mid range), while close-up shots use the proximity effect, utilising the low-mids and often lower. Keyboards would otherwise have a very 'light' sounds, taking up the mid-to-high frequencies, but here the sound involves some lower-mids too. Clearly with a show like this, they can use more varied frequencies for sounds that would otherwise not use them.

Fluctuations: Changes in sound are as important as changes in the image for a 'Mockumentary' style show such as The Office. With so many swiftly changing shots, quick camera movements and single-shot takes, it's important that the sound stays consistent and varies accordingly for the scene. Particularly with the one-shot takes, where the camera is walked through the office, sound has to change enough to offer an audible picture of the environment it's moving through. A good exercise is to find one of these sequences and watch it without the image - you'll notice a lot happening which would otherwise seem normal with the image; a consideration necessary for the Sound Designer when mixing everything. In fact, you could do this yourself at your own office or workplace: even there, you'll find fluctuations in volume and frequency content.

Conclusions:
From looking at these two examples, we can quickly see some correlations in the needs of a mix for film, TV or even any form of sound scape: regardless of the style, filling out the volume, content and frequency range appropriately is vital. You could argue the same for a song without a bass guitar; instead, the guitar would need to be 'chunkier' and the kick drum would have a more open deep sound to compensate.

These are thoughts you need to consider when designing the sound for your own project - is the frequency range, volume and content fulfilling the mix? Ask yourself this through the entire process: you won't want to be destructive in editing or mixing and find the decision was made in error.

I hope you've enjoyed this post! Please leave a comment if you have any thoughts to add, or better still, let me know of any personal experiences you've had with this kind of thinking.

Next Time: UDK Game Audio! - I'm finally going to dive into my love of interactive sound. This first post in the series of many will briefly touch on best practices of audio before getting to the importing stage and basic implementation of sound in a 3D game world.

Alex.

Wednesday 29 May 2013

Quick Update

Hello All!

Just a quick update to say that I'm not dead.

There's been a lot going on at home with refurbishing and moving around; I'm currently in a temporary bedroom that consists of a laid out futon and a small bedside table. However, sound moves onwards and I'm trying my best to keep up with it.

I've been working on a couple of things - first, I'm putting together some songs and will be purchasing a few bits and bobs to help me with recording and mixing. To name a couple:

- 2x Yamaha HS80M's - These babies have had a great range of reviews and I found a pair with stands for just under £420. They'll be going either side of my new desk and should help improve mixes drastically.
- 2x Rode NT2-A's - Both of these come with a shock mount and XLR cable, but one will have a reflection filter for that true vocal cancellation goodness.

The Rodes are a desperate purchase to get me in the large diaphragm realm (Yes, LONG overdue). The speakers I currently use are also embarassingly shody, so the Yamahas will really ground me for mixing (i.e. kick me in the face!).

Secondly, I've been putting ideas together for a simple audio-showcase game called 'The Room". It's works on a similar principal to Portal in it's story telling methods. I enjoy my humour, so hopefully it's going to be a laugh to play. It'll be heavy on dialogue from my side, so at this stage I'm writing the script as well as level design.

I hope this suffices for now, hopefully the room (my room that is) will be done in a couple weeks and I can get back to it.

Alex.

Saturday 4 May 2013

Editing and Mixing Sound: The Bigger Picture [Part 1]

How do you start a post like this? Understanding the bigger picture is one of those things that, no matter how much you read up on it and get taught about it, you need experience to really get it. What I'll cover here comes from both teachings and experience (and there is quite a lot to cover) so I've broken down this area into a few posts, starting with the entire production.

The Meaning: The best way to understand your production down to it's finest detail is to have a distinct mindset. That is, you have the knowledge of this 'Bigger Picture' which will guide you throughout the entire process. You can think of it as a go-to moto that will help you make your decisions. For example, some companies have a sentence that sums up what they're out to achieve, such as "Encouraging exploration through innovation". This moto should be used throughout the decision making process as a tool: is the decision I'm making now living up to what we're set out to do? If not, think of something else or compromise.

To that end, you want to have a basic outline for your film, song or game. For sound, this will very much depend on the style of the respective production. A lot of action movies, for example, tend to have 'hyper-realistic' sound design, where exaggerations are made to compensate for how out-worldy the violence and destruction looks on screen. This is similar to classical music, which needs to have a huge dynamic range and little alterations in the way of effects or compression. For a sci-fi game (and film for that matter), the sound design would match the alien elements with unfamiliar sounds and effects (go check out Ben Burtt on Star Wars!). You get the picture though; have a feel for what the production is trying to achieve and base decisions around this.

Planning: All productions big or small need to be planned and prepared as a whole. When I first started putting productions together in groups at college or university, planning always seemed to be second to everything else. I would get stuck into the meat of a project and before I knew it, there wasn't enough time to do some vital elements, like setting aside time for proof reading, mixing, optimisation of audio or video etc. After reflecting on these mistakes, plans were put in place for future endeavours and it definitely paid off. It really did go to show that putting a solid plan in place will help you keep track of the production, find your limits and help you work more efficiently.

There are several ways to go about the start of a plan. It's something that needs a lot of discussion, where everything is laid on the table. The way I would tackle this would be gathering everyone who's involved (or at least the heads of departments) and talk through the entire production. You want to know the following:

- A general timeline at first, which will give you your time limits on production milestones.
- The budget you're working with and how you can fit hardware, software, sound libraries and (most importantly) living costs into it.
What kind of sounds you'll need for the production; you can start gathering them long before the main production gets underway if you know what you're working towards.

With these key elements now known, the department-specific plans can be put into place. The simplest way to achieve a planning outline is through a Gantt chart. This portrays the different elements of your project in linear form against a time scale, as shown below:
This was an example Gantt chart that came with the app GanttProject, free for mac users.

This not only lists everything that needs doing, but you're able to put realistic goals with them and detailed notes for specific elements that require.. well, more detail. It was a tool I used back in university and still use now in my day job to make sure projects are planned effectively. However, planning is only one side of the first stage in your production; you also have to get to know your elements.

Know your elements: A plan is kind of hollow if you come to do your first task and it's all new to you. No one wants to be thrown in at the deep end with tight schedules and quite a lot of pressure on your shoulders. This is why it's important to get to know the different stages, what's expected of you and your team, as well as the outcome you want and how you'll get there.

While planning each stage, you'll need to have detailed discussions and make plenty of notes regarding the best way to tackle them. In every section, they'll be multiple challenges, so getting your head around them as soon as possible will help you down the road. You will have to account for challenges that arise on the way though; this will be inevitable. Just prepare yourself as best you can.

A good example of this is loss of data.
No doubt at some point in your project, there will be the risk of data loss, which can be a huge pit fall for progress. You will need to create an effective system for backing up multiple times at set intervals, even if you do work in a server-terminal set up. You also have to worry about multiple people working on very similar elements: you want to make sure that these files are accounted for, whether they are separated or accessed by everyone. With this in mind, we can move nicely on to another important element of a production:

Keeping Track: This is really really important. As soon as planning is out of the way, you'll probably get started with your area of the project. The key to success from this point onwards is to refer back to your plans regularly; otherwise, why would you have set them up in the first place?

It's quite an easy mistake to make when you're starting out. You really have to remind yourself to look at something to remind yourself of what you're doing. A plan for plan? I suppose that's what it is really. The first step to helping yourself achieve this is by using reminders and notifications on your phones/ipods/ipads/computers. They help me in every step of life, so use them in this instance. Down the road, you'll hopefully come to know of deadlines and how much time remains 'off by heart', just through the use of these reminders, so using them early on should pay off.

Also have regular team meetings (more for games/film). No matter what kind of team you're in for whatever job or project, these meetings will give a clear picture of where everyone is and what needs doing to achieve or surpass the current goals. You may find that you're slightly behind and this can spark some more collaborative efforts from a team member who is slightly ahead of schedule. There may also be changes that are out of your hand, like the budget being used ahead of schedule or current events which affect the production. This is more to keep everyone in the loop to make sure everyone is doing their best to achieve every goal.

Reference against existing products: This can go for any sound project. When mixing and mastering, your ears will get fatigued from doing it for long periods of time. The best thing to do in this instance is go away and either do something quietly or listen to something; something different. This will get your ears out of that style which you've been working with and, when you come back to it, you should be able to have that constructive hearing again.

Aside from this, I know from experience that it's quite easy to get it sounding great for you and your specific sound system. What would happen if you were to play another song or film on the same system though, would yours sound bassy in comparison? tinny? too much in the 2-3kHz range? This is why it's important to listen to other finalised material to make sure you're heading in the right direction. As you'll be creating something that's specific to a style, you'll want to compare it to a few songs/games/films in that style, but there's nothing stopping you comparing it with others. After all, if it sounds good and you want to go for a unique genre, why not? This also brings me onto my final point for this discussion:

Feedback: This should be a HUGE part of your process in any project. As part of the meetings, or when you've come to a personal milestone, ask for what others think of what you've done. Constructive criticism will really help you shape your work not just for what you do now, but in the future too. It's actually the most important thing you can take away from the whole experience, because you can keep what you learned for the rest of your life and through every other project. It really upsets me when constructive criticism is given and isn't absorbed due to a kind of stubborn pride, especially for those who you're genuinely trying to help when they need it. It usually leads to an outcome that could have had more potential by having that extra input from others.

I'll give you an example. Back in university (which I never seem to shut up about, my apologies), I was well into my final project. The whole level was designed and constructed, with systems almost finalised and bugs were being crushed here and there. I took the work to my tutor (Richard Stevens, The Game Audio Tutorial) and he had a quick look at it. Immediately, he was finding flaws in not only where a player can go on the map, but how certain sounds would clash or had a slightly harsh side to them. It was hurtful at first to know that what I had spent so long creating was being torn to pieces, but I am now more than appreciative. A very important point that he made was my level seemed to be very long and ambitious. If I were to cut back on the length and have only 5 sections rather than 7 or 8, I could make the quality of those remaining much better and much more polished, which I did. I swear, that 30 minutes discussion turned my project upside down, but it was all for the better and I can't thank him enough.

Conclusion: I haven't covered nearly everything there is to know about planning and completing a project. In fact, I'll probably add another few posts regarding each different type of production: film, game and song. On reflection, I suppose I should have done this at first, but I think what I have written is useful regardless. I hope you found some use out of it!

For part 2, I'll be covering sound specifically and how you want to balance frequency, volume, panning and effects so there's just enough and not too much or little of these. This will revolve around what I've come to know as the 'Sound Cube': probably the easiest way of understanding all these elements as a whole.

Alex.

Saturday 27 April 2013

Editing and Mixing Sound: Optimising your Recordings

Now I've covered most of the basics for getting a sound source recorded, we can begin to touch on the mountain that is post-production. There are many stages involved in getting your sound from a 'raw' form (that is, straight from the recorder) into something that can be used and integrated into a production; be that a film, game, user interface for a vehicle etc. As this series of posts is going to cover quite a lot in terms of what you can do with sounds in post, I'll start with the step that all productions should start with - optimising recordings.

For the following post, I'll be using Audacity, just because it's a free tool that anyone can use on both Mac and PC. However, the methods shown can apply to most audio editing tools as well as DAWs (Digital Audio Workstations).

Step 1: Cut and Chop, but be wary of a Pop!
Inevitably when recording sound, there will be points of (almost) silence and sections of noise which will be of no use to you. The best thing to do with this sound is to either silence it or delete it all together. To silence the sounds you don't need, Audacity has a feature which allows you to 'Generate' it. The below image shows a sound recording with 2 pieces of audio we want, and some noise that we don't.
This is the editing window for Audacity. Here, we have the recording and I've selected
the noise that we want to remove.

With the default selection tool, you can drag along the desired area of which you want to 'create' the silence, or remove the unwanted noise.


With this noise still selected, we go to Generate and Silence. A small prompt appears
outlining the length of silence to generate (which should be the selected area).

The final product is shown below, now effectively without the unwanted noise.

The selected noise has now been removed from the recording.
You can (and should) take this further though. With all editing, there is the risk of interrupting a zero-crossing point. What is a zero crossing you ask? Well, when a sound wave fluctuates, it does so above and below a point of no movement - known as the zero crossing point. This is illustrated below, where the vertical line lies:


If you choose to remove a portion of your sound, you have to make sure that the start and end of the cut is on a zero crossing. Otherwise, you get what is shown below: a sharp jump in the waves fluctuation. The result of these non-zero crossing edits is a popping sound, which can cause a lot of issues for loops especially.


So how do you prevent such horrible audio gremlins? There are two things you can do which will both help keep the sound from popping and increase your work flow.

1. Zero Crossing Snap: In a lot of audio editing software, there is an option to only snap to zero crossing points. This means that, no matter where you click on an audio region, the cursor will only  snap on a point of no movement. This saves time, as you're not forever having to zoom in and fine tune the selection at a waveform level. This is something I would recommend using a lot of the time, with only a few cases where you might need otherwise, like creating loops that start and end above or below the zero crossing point.

2. Fading: Particularly for editing noise and unwanted audio either side of that you wish to keep, an easy way to clean up zero crossings and unnatural sounding cuts is to apply short fades. Obviously, this means a fade in before the desired audio and a fade out at the end of it. For splicing audio together, you can use this same technique on both bits of audio, and overlay one on the other ever so slightly so an almost 'seamless' transition occurs. Wherever possible, I would always try to bake these fades in, to save strain on a DAW session file. Fades can take up vital CPU power, so having all these edits in the audio file itself really helps put the work elsewhere for your processor, such as the Automation of a track.

Separating Sounds
When you've made a clear separation for your sounds by deleting unwanted audio, it's now time to create individual files for these. As far as I'm aware, Audacity doesn't have the most intuitive process to save separate sounds, but Adobe Audition (which I use a lot of the time) allows you to separate sounds and save them accordingly with very little input. Regardless, we'll go over how to process these sounds in Audacity.

So at this point, we have 2 sounds that were recorded within the same take. The first thing we'll need to do is cut one sound out (or copy it if you're wary of data loss). The next thing to do is create a new session and add a mono or stereo track, depending on the type that you copied from; stereo in this case, as the recording was made in stereo.


When this has been created, we simply paste the audio into it and we have our sounds separated. Now, if you've recorded lots and lots of sounds in one session that you'd like to chop up, this is obviously going to take a bit of time. Unfortunately, Audacity doesn't have any tools to compensate for this, but another method is available where you can keep a single session and not have to chop up all your audio. This does require you bouncing the file directly out, but it means you can separate everything much quicker. All you have to do is select the audio you want separating and then Export Selection (make sure you have the format WAV or PCM selected, I'll explain why later).


Removing Unnecessary Audio
This can apply to every kind of production, but is especially important for Game Audio. Due to the memory limitations on consoles and mobile devices, every aspect of a game must be optimised to the nth degree, including audio. The first means of optimising a sound in this instance is removing any waste audio at the start and end of it. The most effective way of doing this is by selecting the silence up to the start of the waveforms movement and then zoom in to fine tune the selection.

Here, I've zoomed in to fine tune the selection. It's far too easy to delete too much by
accident, so always listen to the sound as you're deleting.

There are some instances you must be wary of though. In the past, I've removed a little too much audio either side, which has created a distinctive 'jump' in volume. More often than not, this occurs when removing audio from the end of a sound, as natural reverberence can be mistaken for unwanted noise. To avoid this, always listen to the sound as you're deleting; if you delete too much, just go back on yourself (undo is your friend!).

This is a good example of too much audio selected for deleting.

If for whatever reason the sound you have has a 'jump' in volume that you can't go back on, there is another solution - a short fade in or out, as I discussed earlier. For example, you have a sound which has a very short build up before the body of the sound (a ray gun possibly?). Unfortunately, when the sound was separated from a session with a few takes, the build up was cut off slightly and now sounds unnatural  To help improve this, you can select a short portion of the start and apply a 'fade in' to it.

If the cut off is at the start, select a small portion and apply a simple Fade In...

...Similarly if the end is cut off, apply a short Fade Out.

With other productions, such as sound for film or music, it's not a huge issue if silence is left in the file, as automation or gating can remove this from the final mix down. However, new technologies in the near future (I'm looking at you, Pro Tools 11) will mean than removing silence WILL have a benefit on CPU usage, at least in the post-production stages. This is due to the way in which plugins currently work to process sound: when the session is playing, all plugins are in constant use, regardless of there being sound in the track to play, which is quite a large waste of processing power. In this new software, the DAW will now look forward in a track to see exactly where a plugin needs to turn on and off, vastly reducing usage.

Now that the sound has gone from being recorded to separated to optimised with the removal of unwanted sound, we can now move on to the volume side of the waveform.

Step 2: Gain and Normalisation causes much less Frustration
Thankfully, this next step doesn't take too long to accomplish, but has a lot of issues that need to be avoided. Basically, when you have your sound recorded, the signal strength generally doesn't take advantage of the headroom available. This is for good reason though, as it's used as a safety net in case the sound decides to jump in volume. However, with the sound recorded, we can now adjust this gain level to take advantage of that space left behind.

The easiest, quickest and safest way to achieve this is by using the normalisation function on your audio editor. This will take the entire waveform (or a selection) and bring the gain up until the highest peak hits the limit that you set. For example, the below image shows a waveform on the left which is unchanged. If we normalise to 0dB, it will increase the volume until the highest peak is exactly at 0dB, which gives us the waveform on the right.

This way, the waveform is increased in volume, but avoids distortion.
The second method is by increasing the gain manually. This does give you a little more freedom and is great for when your sound source has a little more noise floor than anticipated, but runs the risk of distorting the waveform... and once the sound is distorted in a destructive editing environment, you can kiss it good bye. This is why you should ALWAYS account for backups, save your sessions often and save them separately for progress!

Step 3: Simple EQ, which is easy to do
So just from listening to your sound source, you should have an initial impression of the frequency range it has and what you'll want to gain from it in production. This is where you can use that impression to help you get a feel for what frequencies will ultimately be removed and kept. At this stage however, we just want some very simple EQ that will remove the 'invisible' frequencies. By this, I mean the frequencies outside of what the source uses. Well how is this possible? Surely if you record a source with a range between 500Hz and 5kHz, you'll only pick up those frequencies? Unfortunately, the nature of a recording states otherwise - your microphone will literally pick up everything it is capable of. This is why we have shock mounts for condenser microphones, to help prevent deep rumbles and sharp movements coming out on the recording. In fact, no matter how well you set up a microphone, there will always be some form of unwanted frequency that needs removing in some capacity; this is why the HPF (high pass filter) is your best friend. This will bypass all that sub-frequency content that would otherwise come back to haunt you in post production.

Now I've covered that, let's look at a real world example. Here again, I have my recorded sound, now cleaned up with all unwanted noise removed and gained correctly.

By going up to Effect and selecting Equalization from the toolbar, you can add a very simply HPF that will remove any unwanted low frequency content. Below you'll see the interface which has been built for Audacity. A lot of modern DAWs have a simple button which adds a HPF; all you have to do is adjust at what frequency it starts to cut and how quick the volume slopes off. With this though, you get a simple line tool which you can adjust by adding points and moving these around. I've drawn 2 points on this and left 1 at 0dB around 100Hz and the other dragged all the way down to remove all those frequencies and below.

It's worth mentioning here that you don't really want to cut too much. Later on in post-production or in another project, you may want to use a certain frequency range that was removed in this step. What you want to do is hear how the EQ affects the sound before applying it, as the whole point is NOT to have the HPF affect the sound obviously. It may seem very strange to say that after all I've explained, but it's more of a cleaning exercise than an attempt to make your source sounds better. There are two simple examples of where this is a clear benefit later on in production:

  1. Layering sounds: When you get to a point in the production where multiple sounds start to pull together and play along side each other, these sub-frequencies start to build up if you haven't removed them. They can cause a lot of problems with the bottom end, so you can save some time by removing these now.
  2. Pitch shifting: If you don't remove these frequencies and decide to pitch shift your sources up, you might start to hear what was once too low to hear naturally. E.g. if you have an 'invisible' frequency at 20Hz and pitch shifted your sound up 3x, this would turn into noise at 60Hz, which is well within hearing range.
You can also use a LPF (low pass filter) to cut out a lot of the higher frequency content. This is best for being used on any low frequency sounds that don't have any mid or high frequency content initially, as you don't want to remove anything you might need in the future. Again, it's a cleaning exercise to make your life a little easier later in the post-production stages. Removing unwanted low frequencies is more important at this stage though.

Now that we've got our basic source all cleaned and ready to go, we can bounce the sound ready for use in a production.


Step 4: Bouncing your Sound and the King is Crowned
This is very important to get right for any production. At this stage, you don't want to loose any quality from the recording session, which should have been done at as high a quality as possible. The biggest mistake made here is thinking that mixing down or bouncing a sound to mp3 or another lossy format is ok, as long as it has a high Kbps rate. This is not good! Only when your production has gone through a final mixing and mastering stage are you even allowed to think about mp3 or lossy, which I choose not to condone anyway. When bouncing your sound, use a lossless format like .aiff or .wav.

As long as you've taken the steps above, this should be very easy to do. In audacity, all you are required to do is Export the sound from the file menu, and make sure the format is WAV (or PCM [Pulse-Code Modulation] as some software shows it) as shown below.

I want to mention something that I feel is very important before I conclude this blog post. Consider how you name your sounds and where you bounce them, as you'll probably be saving a lot of them. It's far too easy to save sounds with odd names or ones that have no meaning. Before you know it, you're taking a significant amount of time to find what you need. It's therefore best to come up with a naming scheme that will allow for quick and easy searching of specific sounds. Let me explain what I mean.

First, you may want to start the name of the file with what kind of sound it is. If it's an ambience, you may put an 'A' at the start. Next, you may have many different types of ambiences, like mechanical or forestry. For this, you can add a '_Mec' for mechanical, or '_For' for forestry. Then finally if you have a few ambience tracks with the same feel, you can have a number for each one. The final name therefore would be along the lines of 'A_Mec1' or 'A_For3'. Another example for an SFX of a big gun with natural reverb could be 'SFX_Gun_Big_Verb1'. You get the idea.

Conclusion: I hope what I've covered has made sense for the most part. As said earlier: at this stage, you don't really want to be altering what your source sounds like; you just want to clean it up and make it easy to work with once you get to your production. When we come to the DAW stage, with adding sounds and creating track groups, we can really open the doors to EQ, compression, effects and all the lovely bits of Sound Design that really make it worthwhile. Also, many apologies for the section titles; on reflection, they're in line with what a teacher might put on some slides to make their subjects more interesting. Please feel free to slap me through the internet.

Next time, I'll attempt to cover what is the bigger picture of a production and how to frame your mind for mixing, levels, avoiding things like over-compression and the dreaded dynamic range which even I struggle with. It is all in the planning!

Alex.